Difference between revisions of "How to install Addons"
From URCHN Arkipelago
Views
Actions
Namespaces
Variants
Tools
| (One intermediate revision by the same user not shown) | |||
| Line 1: | Line 1: | ||
These are simple instructions that apply to most addons. | These are simple instructions that apply to most addons. | ||
| − | For SVN users: | + | For [[SVN_and_Helga_access|SVN]] users: |
* Start Blender[[File:scenelayer_addon.png|thumbnail|right]] | * Start Blender[[File:scenelayer_addon.png|thumbnail|right]] | ||
| Line 10: | Line 10: | ||
* Save User Preferences | * Save User Preferences | ||
| − | For Sparkleshare users: | + | For [[Sparkleshare]] users: |
* From sparkleshare icon, Add New Hosted Project | * From sparkleshare icon, Add New Hosted Project | ||
Latest revision as of 11:37, 4 March 2013
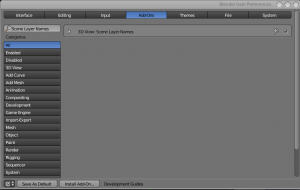
These are simple instructions that apply to most addons.
For SVN users:
- Start Blender
- File->User Preferences->Addons tab.
- Install New Addon
- browse to $tubeSVNroot/lib/python/addons/ADDON_FILE.py (or .zip)
- Enable the addon.
- Save User Preferences
For Sparkleshare users:
- From sparkleshare icon, Add New Hosted Project
- Select on My Own Server
- Address is ssh://git@keg.hampshire.edu
- Path is /home/git/tube/addons
- Once you have the folder in Sparkleshare/Addons install any addon as follows:
- Start Blender
- File->User Preferences->Addons tab.
- Install New Addon
- browse to Sparkleshare/addons/ADDON_FILE.py (or .zip)
- Enable the addon.
- Save User Preferences
