Difference between revisions of "Timelapse toolbox"
Views
Actions
Namespaces
Variants
Tools
| (9 intermediate revisions by the same user not shown) | |||
| Line 16: | Line 16: | ||
=== Drivers To Curves === | === Drivers To Curves === | ||
| + | [[File:driverstofcurves.png]] | ||
The Inverse of the previous option, it will copy the drivers mapped from the min/max of the property of the active pose bone into animation curves mapped to frame start/ frame end of the current scene. Workflow: | The Inverse of the previous option, it will copy the drivers mapped from the min/max of the property of the active pose bone into animation curves mapped to frame start/ frame end of the current scene. Workflow: | ||
** select driven objects | ** select driven objects | ||
| Line 23: | Line 24: | ||
** Curves will be created/ mapped to frame start/frame end from the min and max of that property | ** Curves will be created/ mapped to frame start/frame end from the min and max of that property | ||
** The original drivers will '''not''' be deleted, so you will need to do this if you want to see the animation. | ** The original drivers will '''not''' be deleted, so you will need to do this if you want to see the animation. | ||
| + | |||
=== Display to Render === | === Display to Render === | ||
It is often desirable that renderability curves/drivers for the objects or their modifiers match exactly with visibility curves. This utility simply copies them over: | It is often desirable that renderability curves/drivers for the objects or their modifiers match exactly with visibility curves. This utility simply copies them over: | ||
| Line 39: | Line 41: | ||
** Select animated objects | ** Select animated objects | ||
** Press Ctrl F1 and select Un Curve to unlink all actions from your objects | ** Press Ctrl F1 and select Un Curve to unlink all actions from your objects | ||
| + | === Show Bools === | ||
| + | Coming soonish! | ||
| + | == Tools for Timelapse in the node editor (shaders) == | ||
| + | [[File:TimelapseShaders.png]] | ||
| + | === Create a Time Driven Group === | ||
| + | while timelapse toolbox can directly convert material animation into drivers, this is only really good for 'one-offs': such materials will work just fine, but will be only usable for specific cases, not easily generalizable to reusable nodegroups. There is another way however: use timelapse toolbox within the node editor, to convert animated node trees into a node group with a 'time' input. This will keep your animation curves, converting them into curve nodes with the time input as Fac, preserving delicate timing you've created. | ||
| + | Animated Color ramps can be used, Timelapse toolbox will simply convert them into nodegroups inside the main group. | ||
| + | |||
| + | === Turn Ramp Node into a Group === | ||
| + | Color ramp nodes are super useful in timelapse sequences, video to help explain: | ||
| + | <HTML5video width="720" height="420">rembrand</HTML5video> | ||
| + | As you can see, the color-ramp, with animation, can change a grey scale texture into a progression over time. This can be done with any of the interpolation types, so you can use a constant interpolation to make the effect of 'flakes' falling off - this can be done with an image texture or with voronoi cells texture. | ||
| + | The following interpolation types are supported by timelapse tools: | ||
| + | * Linear | ||
| + | * Constant | ||
| + | * Ease | ||
| + | bezier and cardinal are '''not''' supported, as the math is a bit more complex. However, there is no limit to how many stops you can use, or how you want to animate them (color or position) | ||
| + | However, each timelapse element is not available as an input, which means the only way to 'access' them is through direct driving or animation. This is inconvenient for modularisation, so timelapse toolbox can convert the ramp into a nodegroup with explicit inputs for each element (position, color, or both): | ||
| + | [[file:Ramptogroup.png]] | ||
| + | |||
| + | === Add a new Channel to Ramp Group === | ||
| + | Color ramp outputs are quite useful, each element will give us Color and Alpha. The latter can be used to drive (for example) a bump intensity, spec or a mix between multiple shaders. On occasion we'd like more channels per element, to use, for example, for glossiness, bump and roughness. We can't do this to a regular color ramp, but if you've already converted one to a nodegroup, you can simply click on it, hit ctrl-F1 and add a new channel from the menu. | ||
Latest revision as of 16:42, 12 May 2016
Tools for Timelapse Makers in the 3D Editor
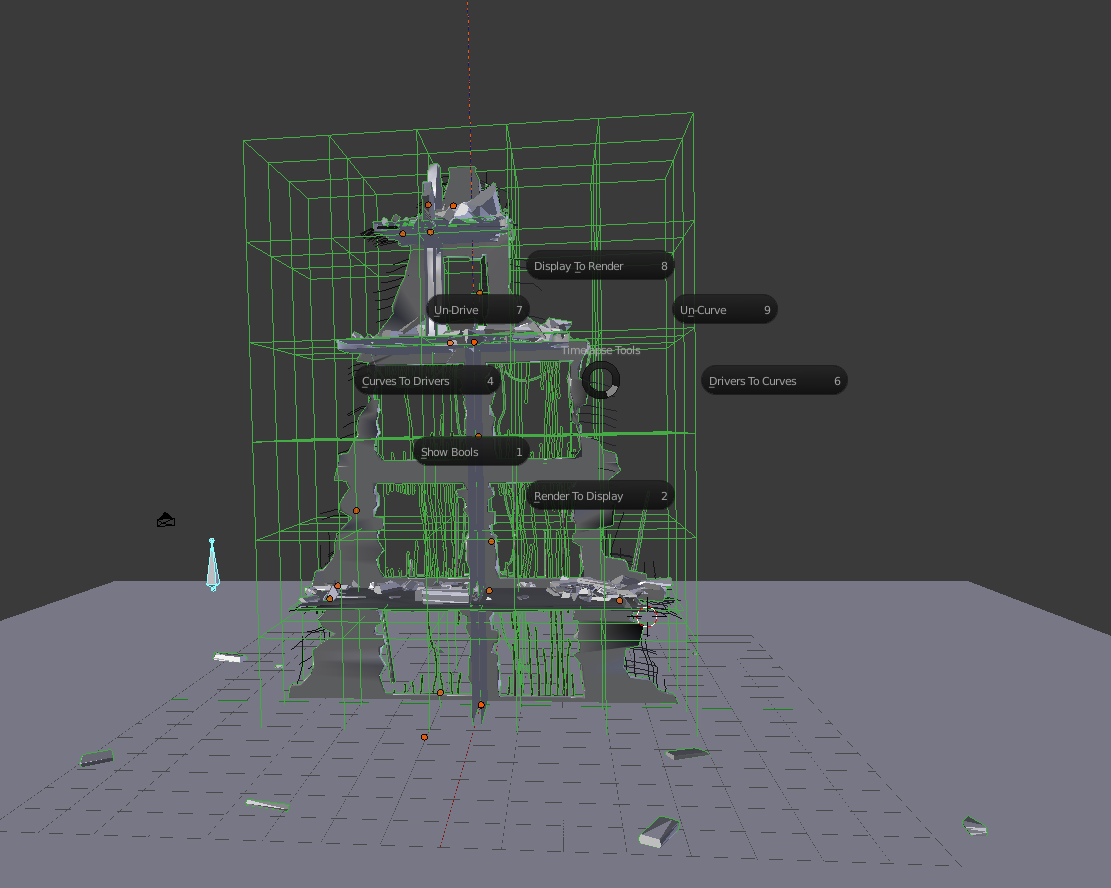
 Currently split into 7 tools, they will affect animation on the object, object-data, modifiers, shapekeys, materials and nodegroups level.
Activate via pie menu with hotkey ctrl F1
Curves To Drivers
 Transforms animation curves mapped to the Frame Start / Frame End of the current scene into drivers based on a property of the active pose bone.
Workflow:
- Select animated objects
- Shift Select a bone with at least one driver you need to use
- Press Ctrl F1 and pick Curves to Drivers from the menu
- If you have more than one property, you will be presented with a popup to select which one to drive from, and then press OK
- Drivers are mapped to the min and max of the property (it should be a float) from frame start and frame end
- The original Actions are not deleted.
Drivers To Curves
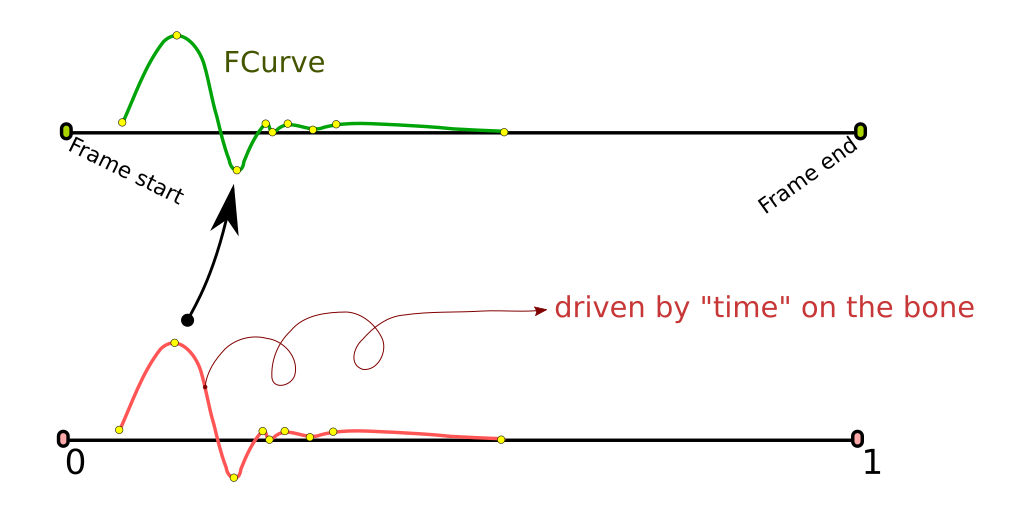
 The Inverse of the previous option, it will copy the drivers mapped from the min/max of the property of the active pose bone into animation curves mapped to frame start/ frame end of the current scene. Workflow:
- select driven objects
- Shift Select a bone with the property you are driving with
- Press Ctrl F1 and pick Drivers to Curves from the menu
- If the bone has more than one property, you will be presented with a menu to select the desired one
- Curves will be created/ mapped to frame start/frame end from the min and max of that property
- The original drivers will not be deleted, so you will need to do this if you want to see the animation.
Display to Render
It is often desirable that renderability curves/drivers for the objects or their modifiers match exactly with visibility curves. This utility simply copies them over:
- Select driven and/ or animated objects
- Press Ctrl F1 and select Display to Render from the menu
Render to Display
It is often desirable that visibility curves/drivers for the objects or their modifiers match exactly with renderability curves. This utility simply copies them over:
- Select driven and/ or animated objects
- Press Ctrl F1 and select Render to Display from the menu
Un Drive
Once you have drivers on an object it will ignore the animation in actions: In order to see it once again, you will need to remove those drivers. This utility does just that:
- Select driven objects
- Press Ctrl F1 and select Un Drive from the menu
Un Curve
Once you've finished creating your driven setup you may not want those extra actions hanging around, doing nothing. Use UnCurve to unlink them:
- Select animated objects
- Press Ctrl F1 and select Un Curve to unlink all actions from your objects
Show Bools
Coming soonish!
Tools for Timelapse in the node editor (shaders)
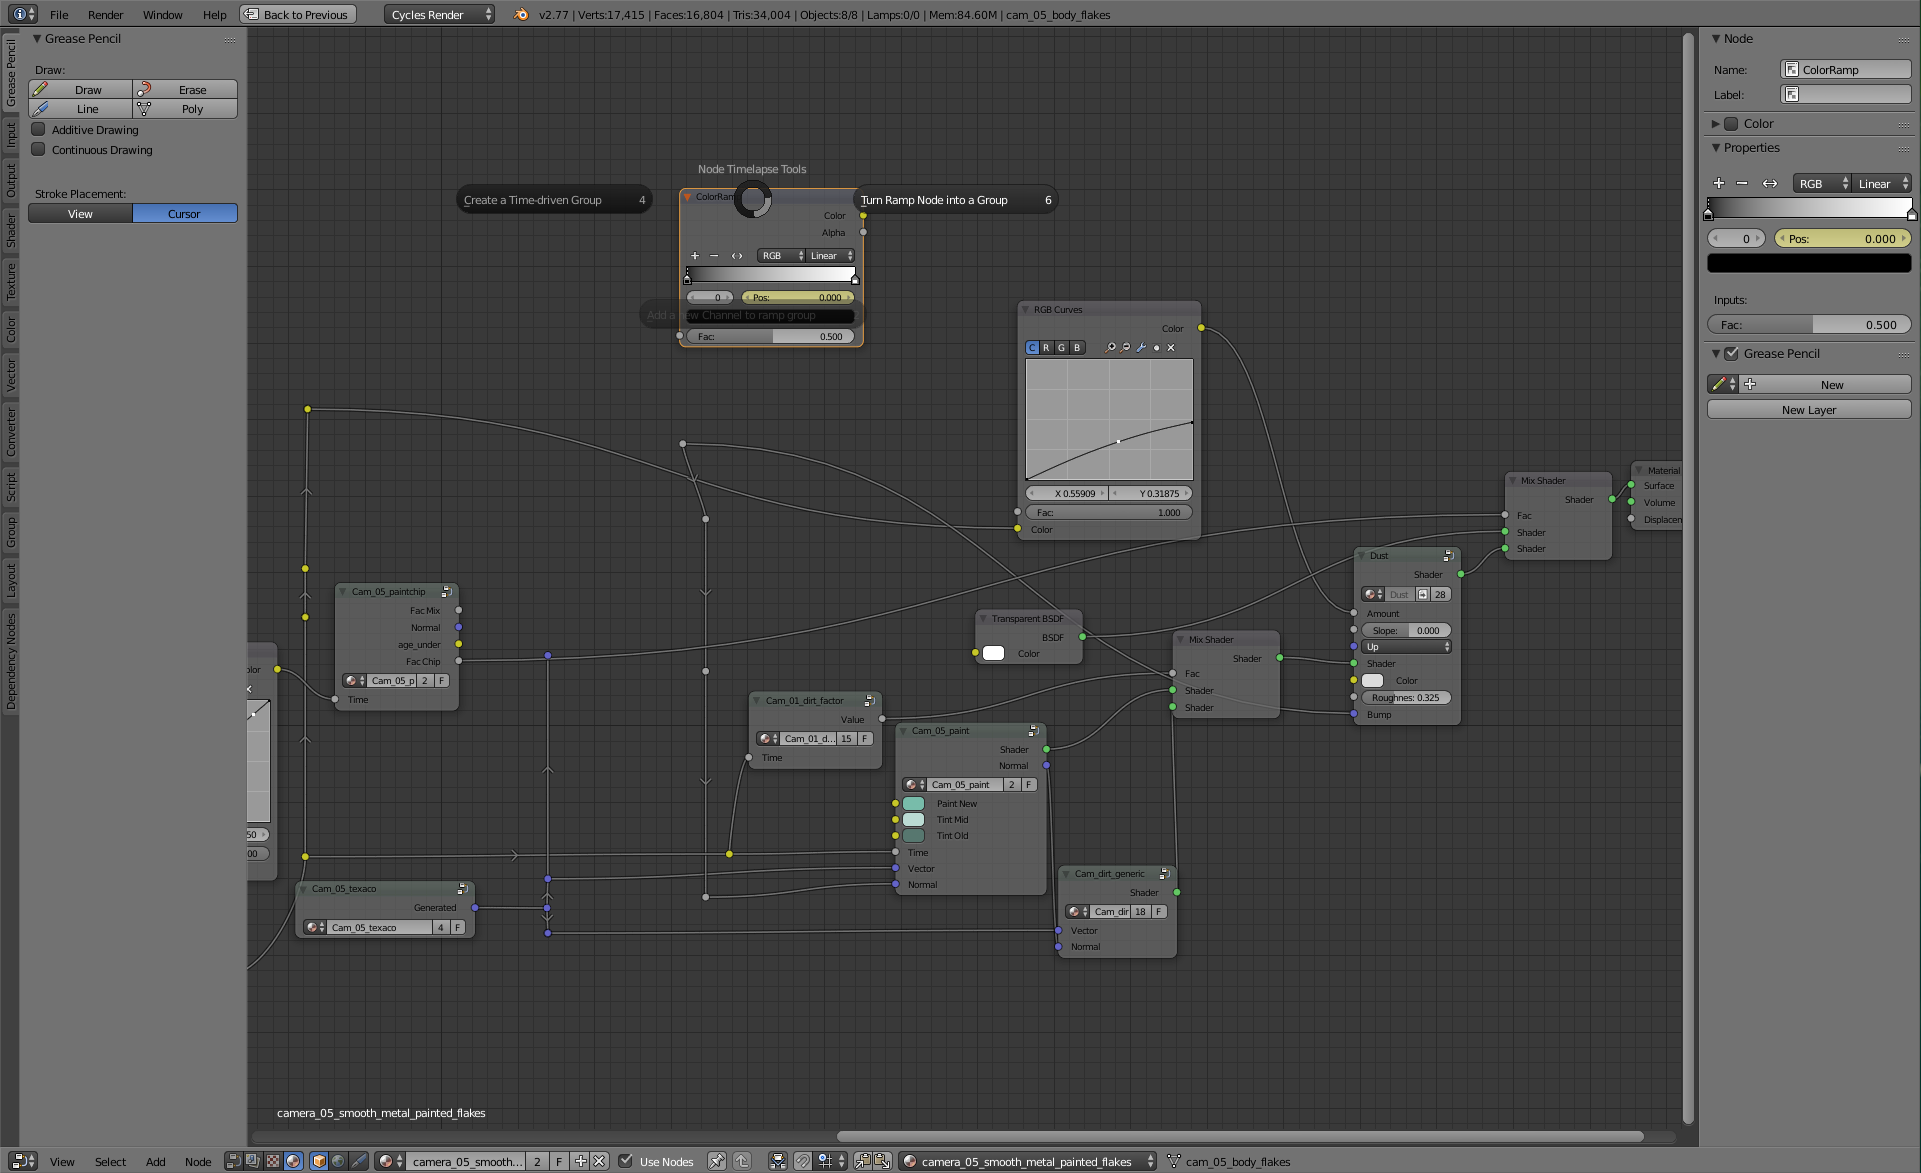
Create a Time Driven Group
while timelapse toolbox can directly convert material animation into drivers, this is only really good for 'one-offs': such materials will work just fine, but will be only usable for specific cases, not easily generalizable to reusable nodegroups. There is another way however: use timelapse toolbox within the node editor, to convert animated node trees into a node group with a 'time' input. This will keep your animation curves, converting them into curve nodes with the time input as Fac, preserving delicate timing you've created. Animated Color ramps can be used, Timelapse toolbox will simply convert them into nodegroups inside the main group.
Turn Ramp Node into a Group
Color ramp nodes are super useful in timelapse sequences, video to help explain: <HTML5video width="720" height="420">rembrand</HTML5video> As you can see, the color-ramp, with animation, can change a grey scale texture into a progression over time. This can be done with any of the interpolation types, so you can use a constant interpolation to make the effect of 'flakes' falling off - this can be done with an image texture or with voronoi cells texture. The following interpolation types are supported by timelapse tools:
- Linear
- Constant
- Ease
bezier and cardinal are not supported, as the math is a bit more complex. However, there is no limit to how many stops you can use, or how you want to animate them (color or position)
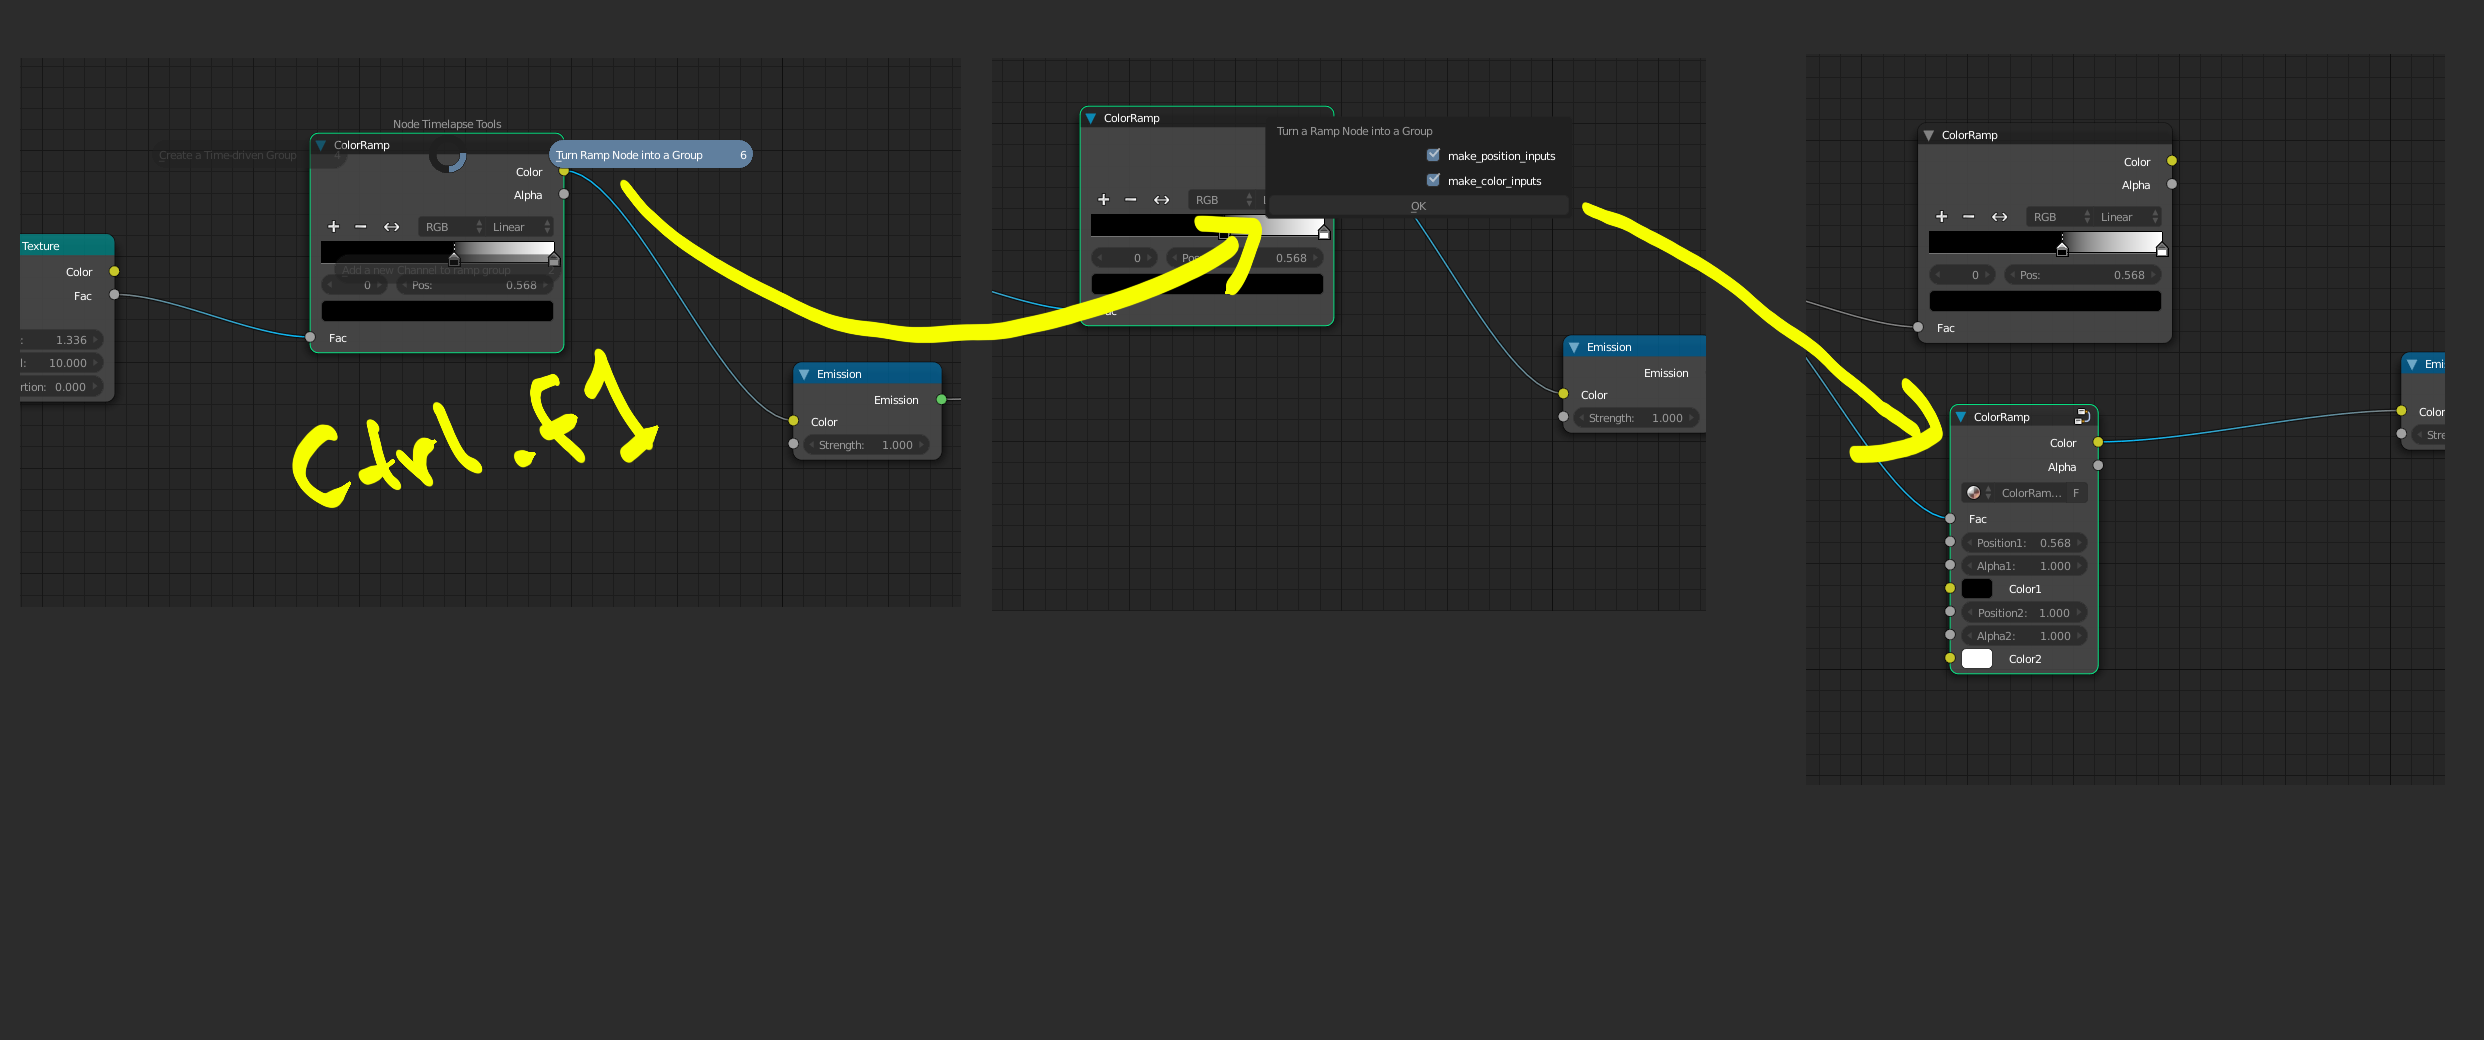
However, each timelapse element is not available as an input, which means the only way to 'access' them is through direct driving or animation. This is inconvenient for modularisation, so timelapse toolbox can convert the ramp into a nodegroup with explicit inputs for each element (position, color, or both):

Add a new Channel to Ramp Group
Color ramp outputs are quite useful, each element will give us Color and Alpha. The latter can be used to drive (for example) a bump intensity, spec or a mix between multiple shaders. On occasion we'd like more channels per element, to use, for example, for glossiness, bump and roughness. We can't do this to a regular color ramp, but if you've already converted one to a nodegroup, you can simply click on it, hit ctrl-F1 and add a new channel from the menu.
