Difference between revisions of "How to get SparkleShare working on Windows"
Views
Actions
Namespaces
Variants
Tools
| Line 23: | Line 23: | ||
[[File:PuTTY config.png]] | [[File:PuTTY config.png]] | ||
---- | ---- | ||
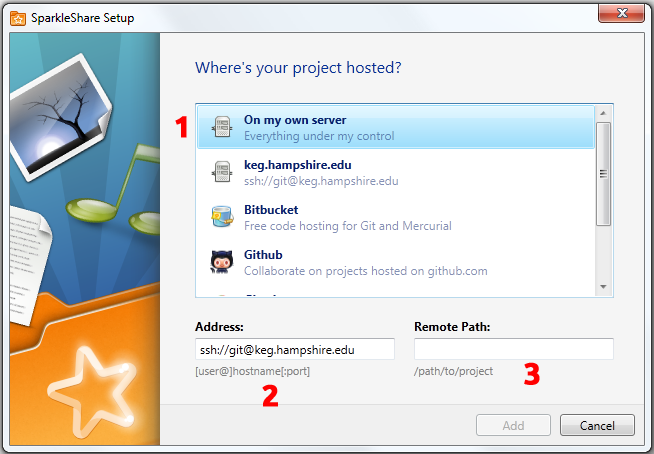
| − | '''Step 7:''' Finally, you can add (i.e. cloning of repository) those project(s) from the remote server. Just type in the right address | + | '''Step 7:''' Finally, you can add (i.e. cloning of repository) those project(s) from the remote server. Just type in the right host address, remote path and click on the 'Add' button. Voila, now it works! |
[[File:Add project SS.png]] | [[File:Add project SS.png]] | ||
Latest revision as of 01:35, 5 July 2012
Step 1: Download SparkleShare, install and then exit the program (without adding any project as we need to do some 'bypassing' now).
Note: If you've administrative privileges and can take the risk of working with Windows Registry System, uninstall and remove any traces of SparkeShare from the system registry (Run command: regedit) if it didn't work in the previous cases and do a 'fresh' re-installation. Also you don't need any Git GUI like msysGit, SparkleShare already comes with a build-in Git module and it serve our purpose pretty well here.
Step 2: Git works in the back-end of SparkleShare through a SSH tunnel and unfortunately, Windows does not come with a SSH client (unlike in Linux and Mac) Hence, we need a 3rd party client, which in our case is PuTTY, a popular free Open Source terminal emulator. Download the Installer Package from this link
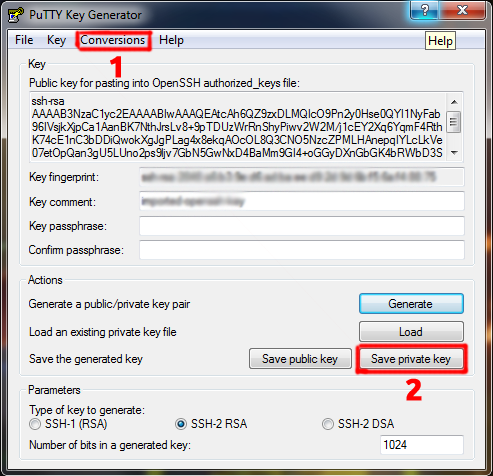
Step 3: Open PuTTYgen, click on Conversions and import a key from this address: Username/AppData/Roaming/sparkleshare (Run command to locate the required directory: %Appdata%\sparkleshare), the file would be named something like "sparkleshare.your_email_id@gmail.com.key".
After loading the key, save the private key (will be required in next step) wherever you please. Once done, you may close this window.
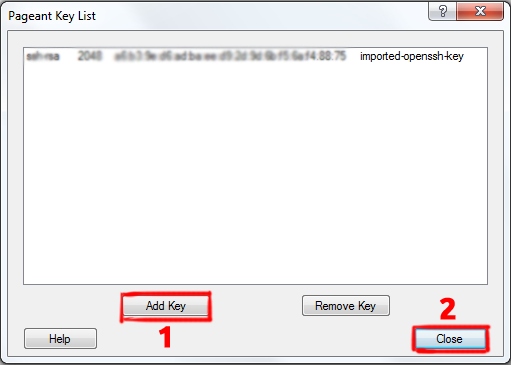
Step 4: Now open Pageant and the add the private key (that you saved in the previous step)
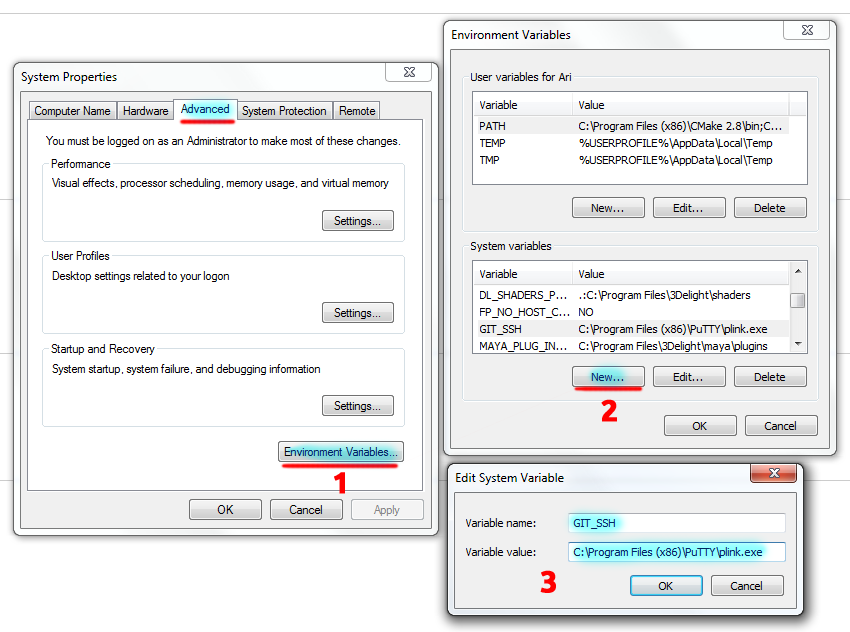
Step 5: Add a path variable name for plink.exe to 'bypass' SSH handling through PuTTY (instead of ssh-agent in Program Files\SparkleShare\msysgit\bin directory)
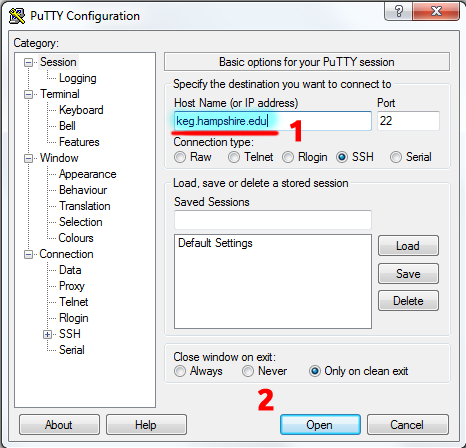
Step 6: Configure your PuTTY.exe with a hostname: keg.hamsphire.edu and default port 22. You will get a terminal window to login, you may close this window after a while.
Step 7: Finally, you can add (i.e. cloning of repository) those project(s) from the remote server. Just type in the right host address, remote path and click on the 'Add' button. Voila, now it works!
